We have created some diagrams to help make your installation simple. Just select which type of installation you want from the list below.
Click on the title of the installation below to show/hide each one.
Download Kit Instructions Sheet
We have a 2 page PDF with basic installation guidance for our kits, you can download it here:
Off Grid with MPPT charge controller
Always connect the MPPT to the batteries first, and then connect the solar afterwards.

With larger setups you will have multiple parallel banks of panels into 1 controller. When putting panels in series ensure you do not go over the max Open Circuit voltage for the MPPT controller you are using. Most of them are 150VOC and then with most panels you can run with upto 3 in series. You should always aim to be at least 10% under the max VOC for the controller to allow for the panels temperature co-efficient and to prevent you from going over the Max.
You can see the VOC rating on the back of the panel and the controller specs will tell you the max for that controller.
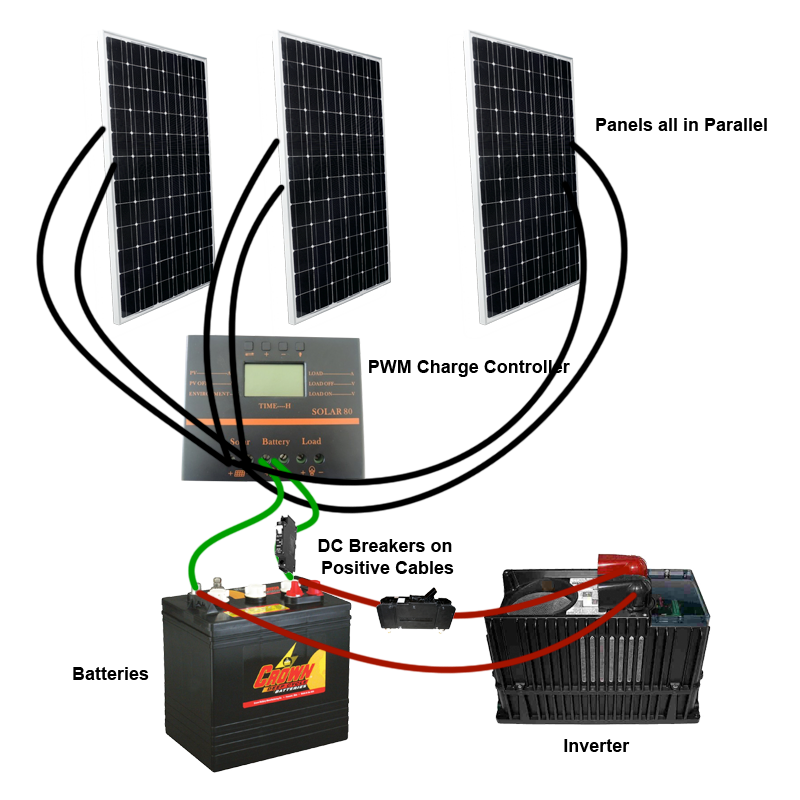
Off Grid with PWM charge controller
Always connect the PWM to the batteries first, and then connect the solar afterwards.
Kits with one MC4 cable
Your kit has come with one MC4 cable, this is to be cut to size for the cable from the panels to the controller and the remainder for cable from the controller to the batteries. The MC4 connectors plug into the panel, and then cut the length you need to the controller. Strip around 10mm of the end of the cable casing to insert into the terminals on the controller for the panel. Ensure you get the polarity + - the correct way around. Use the remaining cable to go from the controller to the batteries, again strip around 10mm from the end and ensure you get the correct polarity + -.
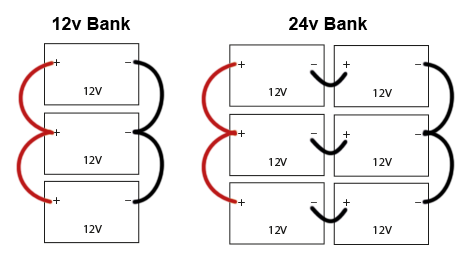
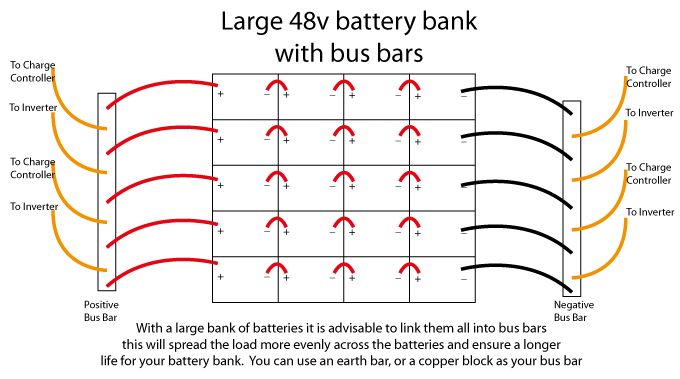
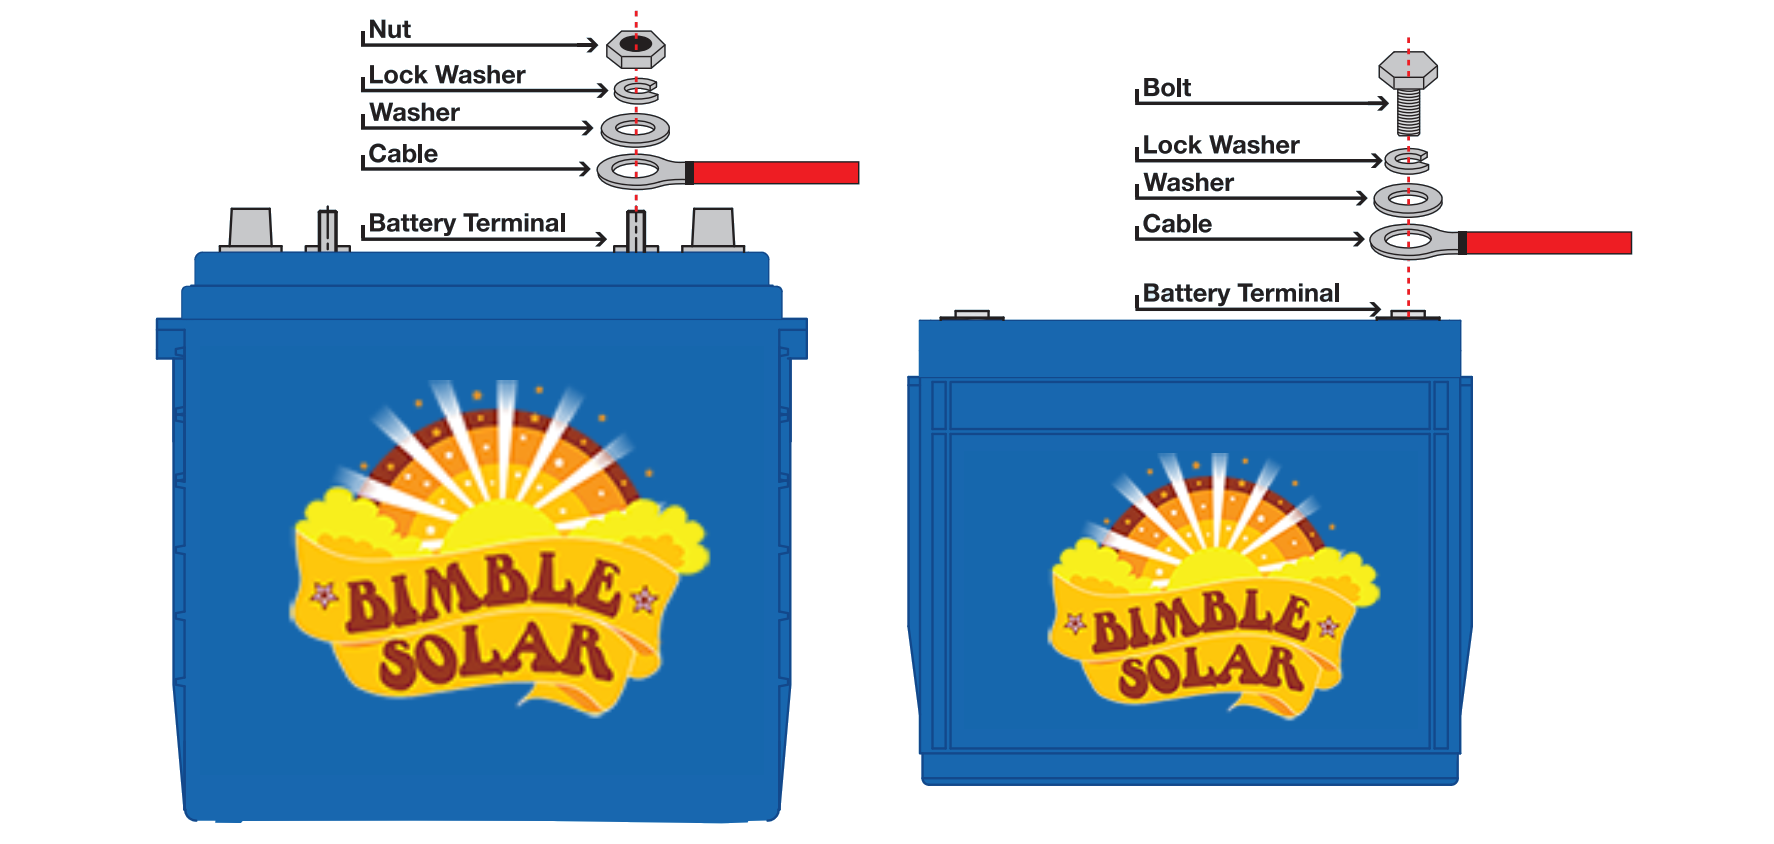
Battery Wiring
Outback Off Grid/On Grid Hybrid System
Using our Outback equipment you can create an off-grid/on-grid hybrid system allowing you to use your solar and battery power when it is available and seamlessly switching to using the grid power if your solar is running low. It will automatically switch back to the battery power again when the solar has charged it up again. This will mean that you will never run out of power and you will have the minium bills from the grid as you will only ever use it when essential. If you use the GVFX or GVF outback grid inverters then you can also sell the power back into the grid as well. You can configure the set points for this in the Mate controller.


 (1)-54x54.jpg)